This guide covers the essentials of using HotDoc's AI Document Assistant, which uploads incoming correspondence, automatically extracts key details, and imports documents into your Practice Management System (PMS). At the moment, it is only for Best Practice users.
|
In this article |
1. What is Document Assistant?
HotDoc's Document Assistant helps your practice save time and manage inbound communication (like faxes, scanned letters, or emails) more efficiently by:
- Processing inbound documents securely
- Extracting key details (e.g. patient name/DOB, practitioner, sender, category, subject)
- Helping match documents to the correct patient and practitioner before import
- Allow you to quickly select where to import these (Patient file, Doctors Inbox)
2. Before you start
Confirm the HotDoc Sidebar is installed and connected
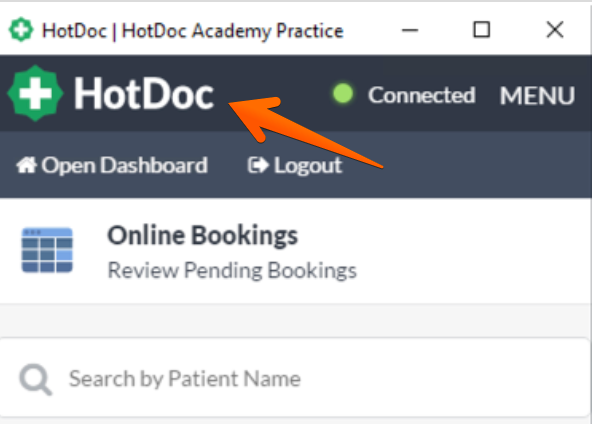
Document Assistant is accessed via the HotDoc Sidebar. If it isn't installed on the computers doing the uploading, you won't be able to use the feature.The Sidebar will need to have the green 'Connected' icon to show that it's successfully connected to Best Practice.
%202026-03-06%2014-45-11.png)
|
To install the HotDoc Sidebar, see: How to Download the HotDoc Sidebar If your HotDoc Sidebar is not connected, see: Why Does the Sidebar Say 'No PMS'? |
Confirm your HotDoc user account has access to the Sidebar
You will require access to the Sidebar in order to use Document Assistant. Practitioner Sidebar users do not have access to Document Assistant.
|
To check or update your user account access level, see: How to Create, Edit or Delete a User Account (HotDoc Login Details) Note: Any changes to your user account access level will need to be actioned by another clinic user. |
Refresh the Sidebar to ensure the Document Assistant feature is showing
Once Document Assistant has been turned on for your clinic, you'll need to refresh the Sidebar in order for it to show up. You can do this by clicking the HotDoc logo at the top of the Sidebar.
This will need to be done for each Sidebar you plan to use Document Assistant on.
3. Setting up auto-archiving - Send instructions to your IT.
You will need your IT to help configure some one-off permissions so HotDoc is allowed to create the archive folder and move files. Please send these instructions through to your IT for assistance: How to set up automatic archiving for Document Assistant |
When you import a scanned document into Best Practice using Document Assistant, the automatic archive feature can automatically move the original file into an "Archived - HD Document Assistant" subfolder inside your scans folder. This keeps your folder tidy, removes the manual work for your team and prevents them from uploading any double-ups.
To use this feature, you will need to be uploading your scans and documents from a shared folder that lives on your server, a network drive or local computer at your practice.
You will need assistance from your IT to set up auto-archiving. You can view how to set this up in the Dashboard under Document Assistant -> Settings.
|
You can start uploading files into Document Assistant without having auto archiving set up. You will just need to manually remove files once imported. At this stage, we don’t support folders Cloud-synced folders like OneDrive/Dropbox. We do support folders set up on a server, shared network drive, or local folder on a computer at your practice. |
4. How to upload and process documents
From the HotDoc Sidebar, go to Menu → Document Assistant.
-
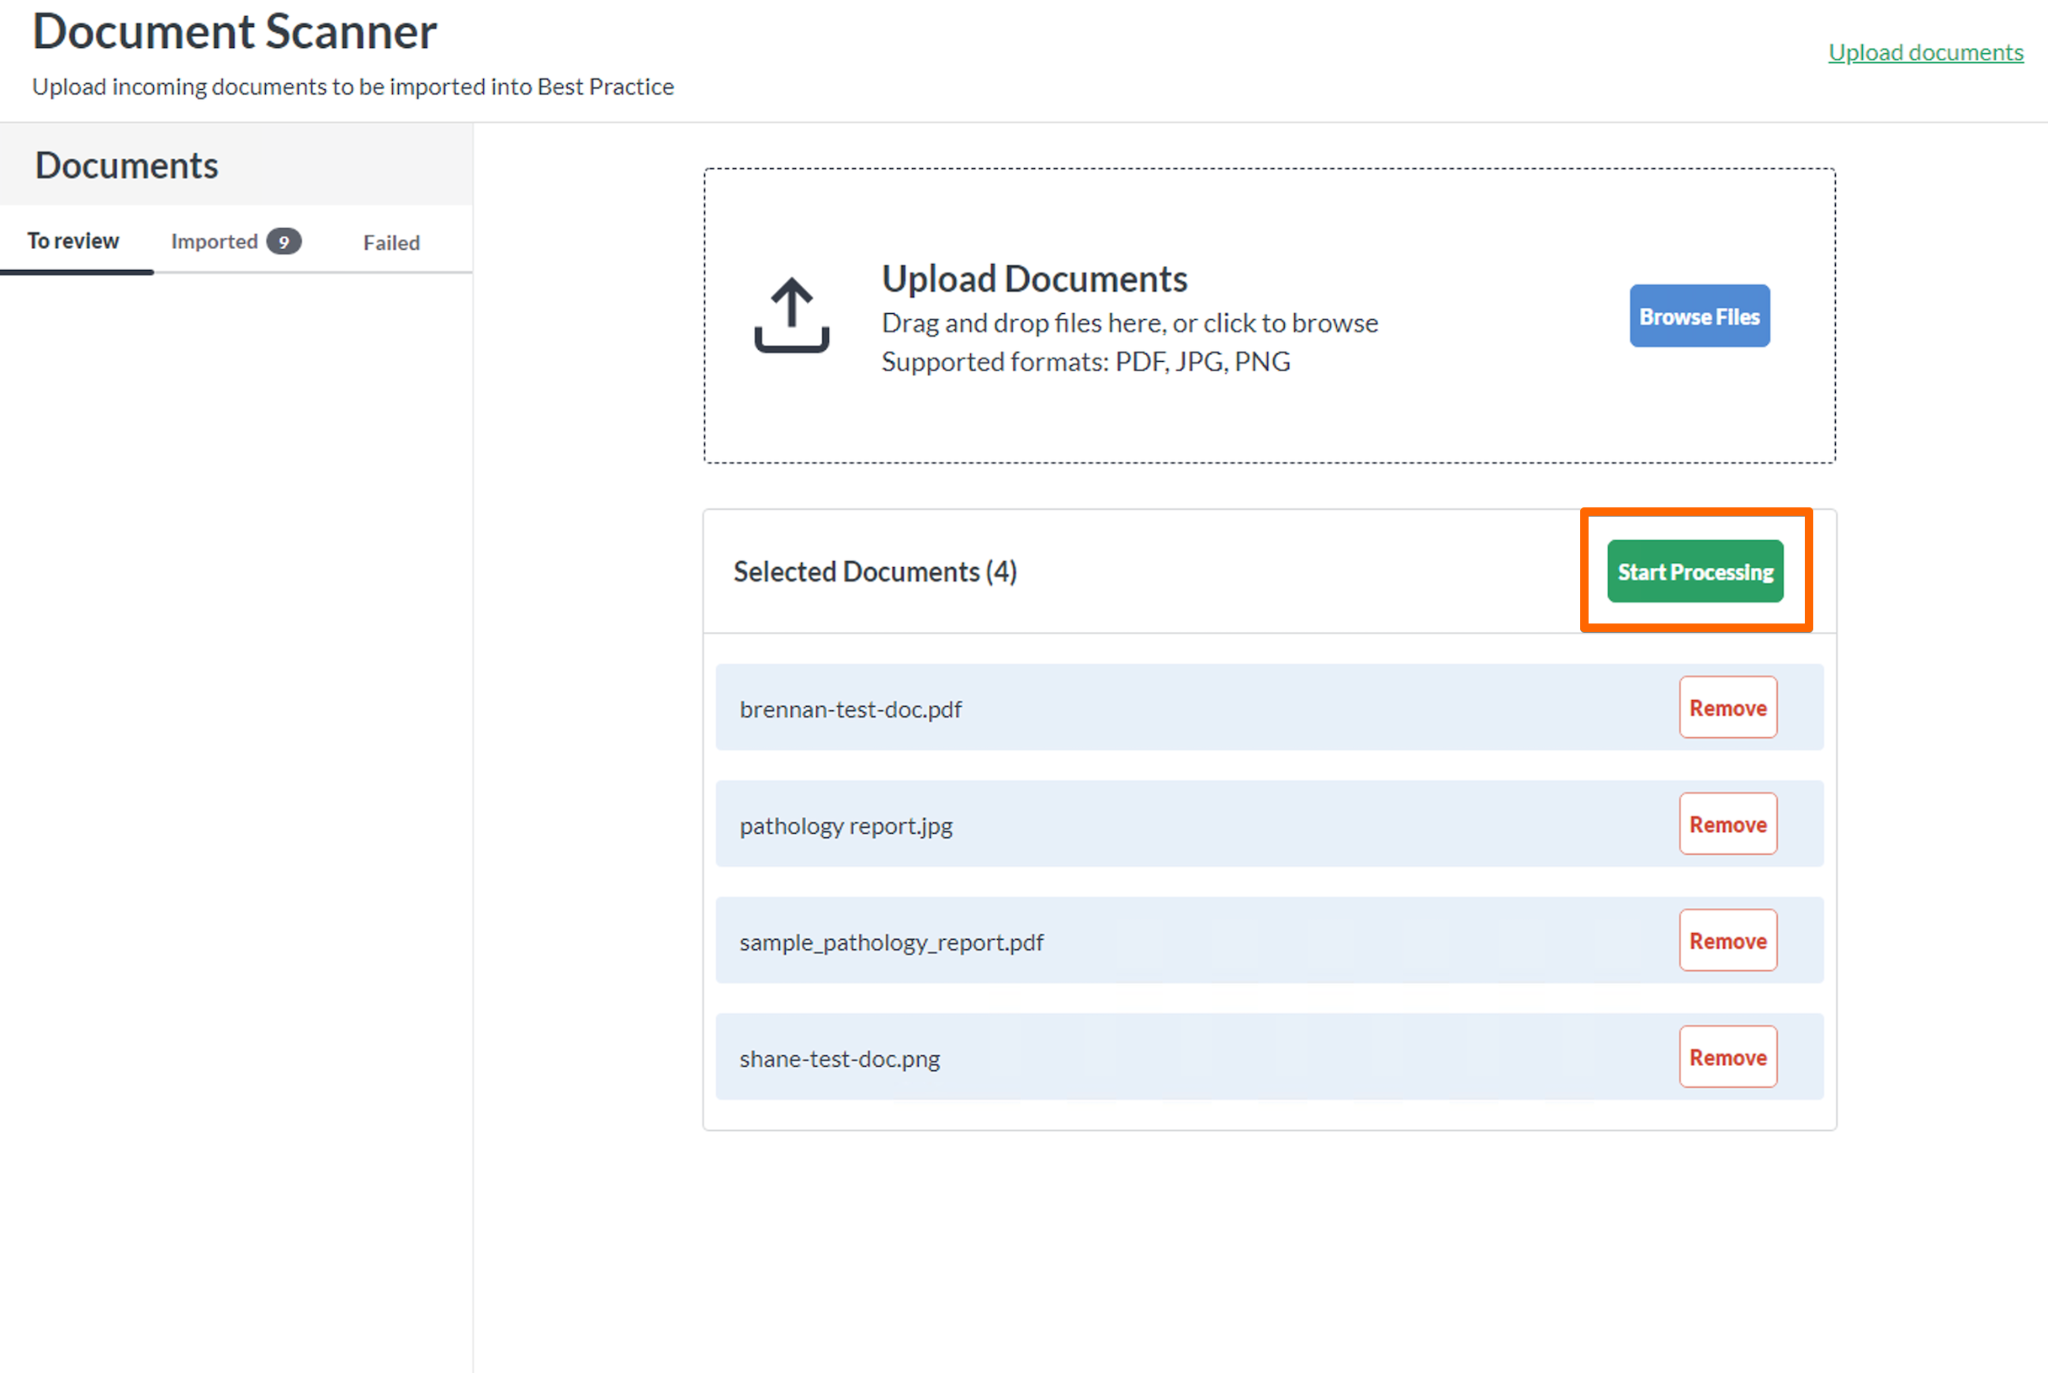
Upload your documents (you can do this in bulk). Supported formats are PDF, JPG, and PNG (DOC/DOCX coming soon):
- Press green Upload button
-
Drag and drop files into the uploader, or Click Browse Files and select from your folder.
-
Click Start Processing to begin. HotDoc will process each file and extract key details (like patient name/DOB, practitioner, sender, category and subject).
Note: If a document has already been imported into Best Practice, we'll show this to avoid accidentally uploading the same document multiple times.
5. How to review extracted details and import into BP
| Treat this step like a quick "double-check" before filing – small fixes here help prevent admin clean-up later. |
Once processing begins, your documents will appear in the left panel with a spinner until each one is ready to review and import.
-
Select the document you want to review from the To Review Tab, you will see the details automatically extract on the right.
-
The extracted fields are editable, so you can correct anything before importing. The fields include:
-
Document destination:
- Doctors Inbox (default): Correspondence In or investigations,
- Patient file (Correspondence In or Out)
- Practitioner (auto-filled from the document, or falls back to their last seen practitioner in BP)
- From Sender / Company (sender details)
- Date of Service (auto filled)
- Subject (auto filled)
-
Category (auto filled) - choose from your practice's categories synced from Best Practice, or type a one-off custom category.
-
Document destination:
-
Once you have confirmed the patient's information is correct, click Import. HotDoc will then import the document directly into Best Practice using the same secure process used for HotDoc Forms.
- Note: If you have automatic archiving setup and the box is ticked, this will ensure it's moved automatically into the archived folder once imported into best practice.
6. What happens after you've imported files into BP
Once a document is successfully imported to your PMS, it will disappear from your To review list and will appear in your Imported list.
If the import fails for any reason, it will appear in your Failed list instead, where you can view the document and its filename so you can ensure you manually import the document to the appropriate location.
If you've set up automatic archiving, once a scanned document has been imported into Best Practice, we will automatically move the original file into an "Archived - HD Document Assistant" subfolder inside your scans folder. You can then empty the documents from this folder, whenever best suits your practice.
Where will the document appear in Best Practice?
Depending on what you selected for the Document Destination:
-
Doctor's Inbox: as Correspondence In, or Investigations, depending on what you selected.
- Patient File: added directly to the patient's record as Correspondence In or Correspondence Out, depending on what you selected.
7. Privacy & security
The short version:
- Your documents are not stored permanently in HotDoc.
- Files are handled securely and temporarily.
- Extracted data will be deleted no later than 72 hours after upload.
- All data is hosted in Australia within HotDoc's secure AWS environment.
- HotDoc is SOC 2 Type 2 certified, meaning an independent auditor has verified that our systems and security controls meet strict standards for protecting sensitive data.
Document processing steps
1. When you click "Start processing"
- Documents are uploaded via the HotDoc Sidebar.
- HotDoc temporarily stores a copy of your document and the file name during processing.
- The document is securely sent to a HotDoc-managed processing service to extract key details (such as patient name and practitioner).
- After processing, HotDoc temporarily stores the document metadata (e.g. patient/practitioner selection).
2. When you click "Import"
To insert the document into Best Practice, HotDoc temporarily stores:
- The document metadata (e.g. patient/practitioner selection), and
- A base64-encoded version of the document (a plain text representation of the file).
HotDoc does not keep a long-term copy of the document. All document details are deleted no later than 72 hours after upload, including if the document was not successfully processed or imported.
Extracted information
The system only extracts key filing details to help you allocate the document correctly, including:
- Patient (identified by name and date of birth)
- Practitioner
- From Name (the person who sent the document)
- Company Name (the organisation who sent the document)
- Date of Service
- Subject
-
Category
This information is used solely to assist with correct filing into Best Practice.
Data hosting
- All data is processed and hosted within HotDoc's secure AWS environment in Australia.
- The extraction process uses HotDoc-managed, self-hosted services – no third-party providers are used for document processing.
8. FAQs
What if the patient match is incorrect (or no patient is found)?
+
If HotDoc matches the wrong patient, or can't find a patient record, you can search for a different patient and link the document to the correct record. You can search by DOB, Mobile, or name.
What if the practitioner or subject is wrong?
+
You can edit the extracted field(s) before importing. The extracted details are intended to be a starting point – your review is the final check.
How long does processing take?
+
Processing time can vary depending on the size and number of files uploaded. Individual documents are typically ready within a few minutes, but larger batches may take longer overall.
As each document finishes processing, it becomes available for you to review immediately – so you can start working on processed files while the rest continue in the background.
What file types are supported?
+
Supported formats are PDF, JPG, and PNG. DOCX/DOC support coming soon.
Why did my import fail?
+
Common failure reasons are an unsupported file type, a network timeout, or a network error.
Does HotDoc use our documents to train AI models?
+
No. Documents are used only to extract key filing details to help match and file them correctly in your PMS. They are not used to train AI models.
Can patients opt out?
+
AI Document Assistant is an internal administrative tool used by your practice. As with other clinical systems, it is the clinic's responsibility to manage patient consent and privacy disclosures in line with your policies and legal obligations.
Is this compliant with Australian Privacy Principles (APPs)?
+
Yes. The system is designed to align with the Australian Privacy Principles, including secure handling, limited use, and appropriate data retention practices.
Is data encrypted during transfer?
+
Yes. All data is encrypted both in transit and at rest, ensuring documents, metadata, and extracted information are protected during processing and import.
Can I see which staff member uploaded a document? Is there an audit trail?
+
At the moment this isn't a feature, but our suggested workaround used by some other clinics is for team members to add their initials in the subject line, so you can see who did what in Best Practice
Can I rotate a file?
+
Currently, you are unable to rotate files in Document Assistant when reviewing.
Can documents automatically come in to Document Assistant via email, fax or a watched folder?
+
Not currently, documents must be uploaded manually, and you are unable to import straight from an email.
Can I edit details on documents after upload, add documents to an existing upload, or copy text out?
+
This is currently not functionality that Document Assistant can support.
Is there a file size limit?
+
Currently the file size limit for Document Assistant is 10MB.